
How to Authenticate with ClickUp API 2.0? How to set up ClickUp API to access workspace, space, folders, lists, tasks, and other ClickUp 2.0 details?
Hi, Hope you are doing well. Thank you so much for stopping by. It’s another day to learn something fruitful. To give you an idea of what we will be learning here. The guide will help you in getting familiar with ClickUp 2.0, understand ways to authenticate to ClickUp 2.0 using ClickUp API, create ClickUp OAuth App, and make the first ClickUp API call. Note, In this article, we are referring to ClickUp 2.0.

Let’s get started!
What is ClickUp?
ClickUp is a task management platform that has the capability to cover almost all operations that one needs for management. It helps you plan, track and manage any type of work with project management that flexes to your team’s needs. It has several different views for your team’s tasks, each reflecting a different set of requirements aligned with different roles.
What is ClickUp API?
The API provided by click enables you to access the workspace’s data and meet any requirement. Using this ClickUp API you can even create your own App.
ClickUp API 2.0 Authentication
Most of the APIs out there need you to authenticate before enabling you to access any kind of data using the API. For ClickUp there are two ways to authenticate. One by using the API Token and the second by creating an application followed by Authenticating through an Access Token (OAuth2 Authentication process).
NOTE:
The API Token is recommended if you are using ClickUp API for personal use or internal company requirements.
If you want to use ClickUp API to build some kind of App, functionality, or service that will be used apart from you or your company. It will be much safer to use the OAuth2 Authentication method.
1. ClickUp API Token Authentication
How to get a ClickUp API Token?
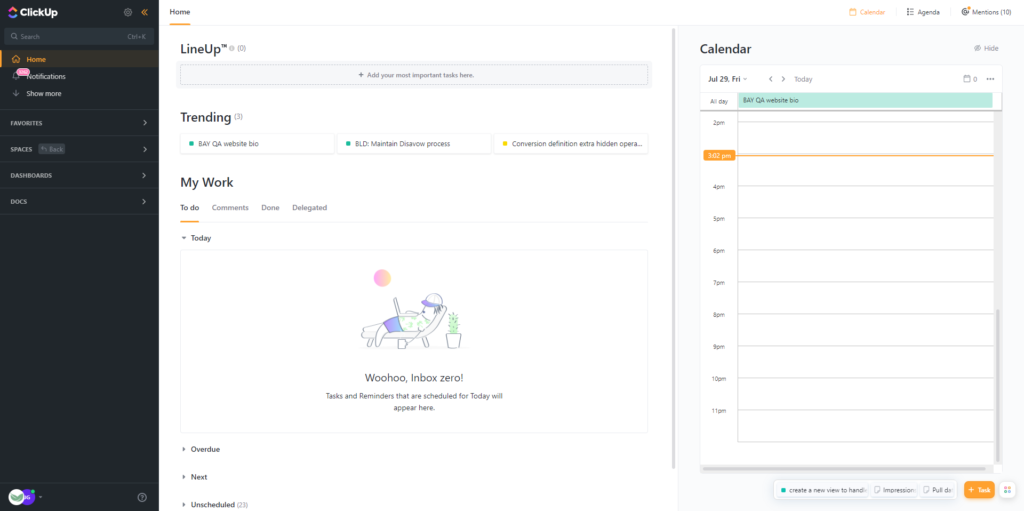
First login to ClickUp. You should see the below screen after you are logged in.
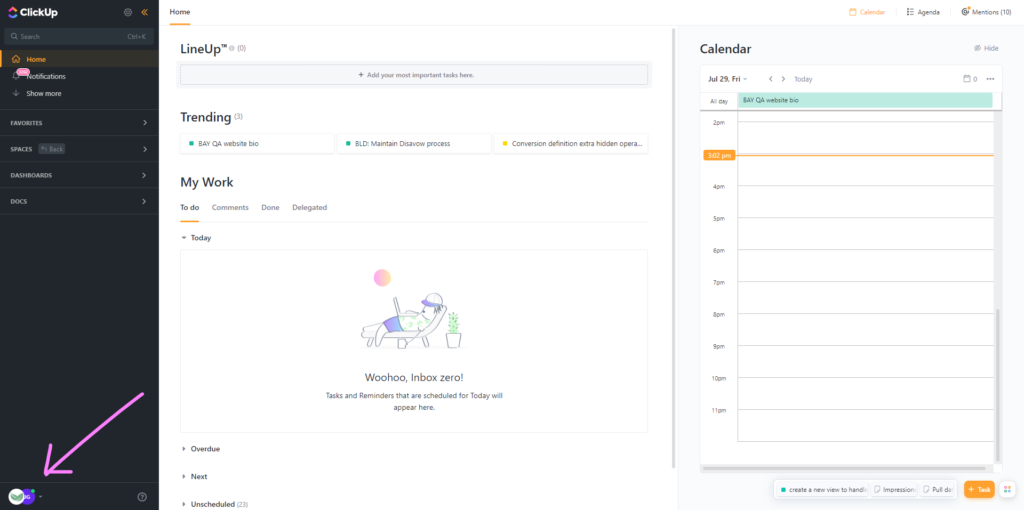
Next, click on your name initials (the avatar) shown at the bottom left corner. Refer above image. After clicking you should see a small popup, similar to the below image.
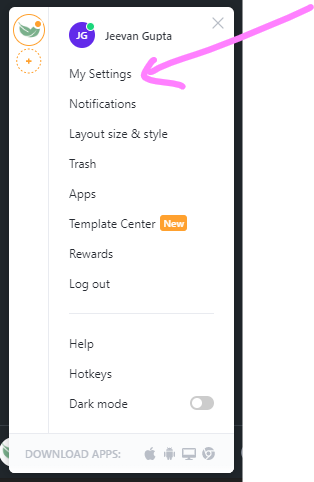
Next, you might have already guessed it. Click on My Settings.
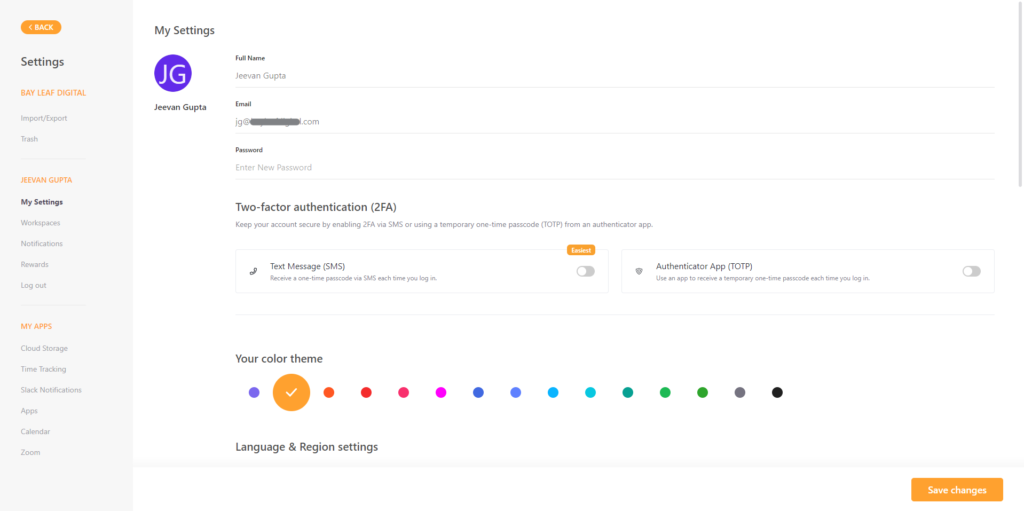
Now you will get directed to a setting page similar to the below image.
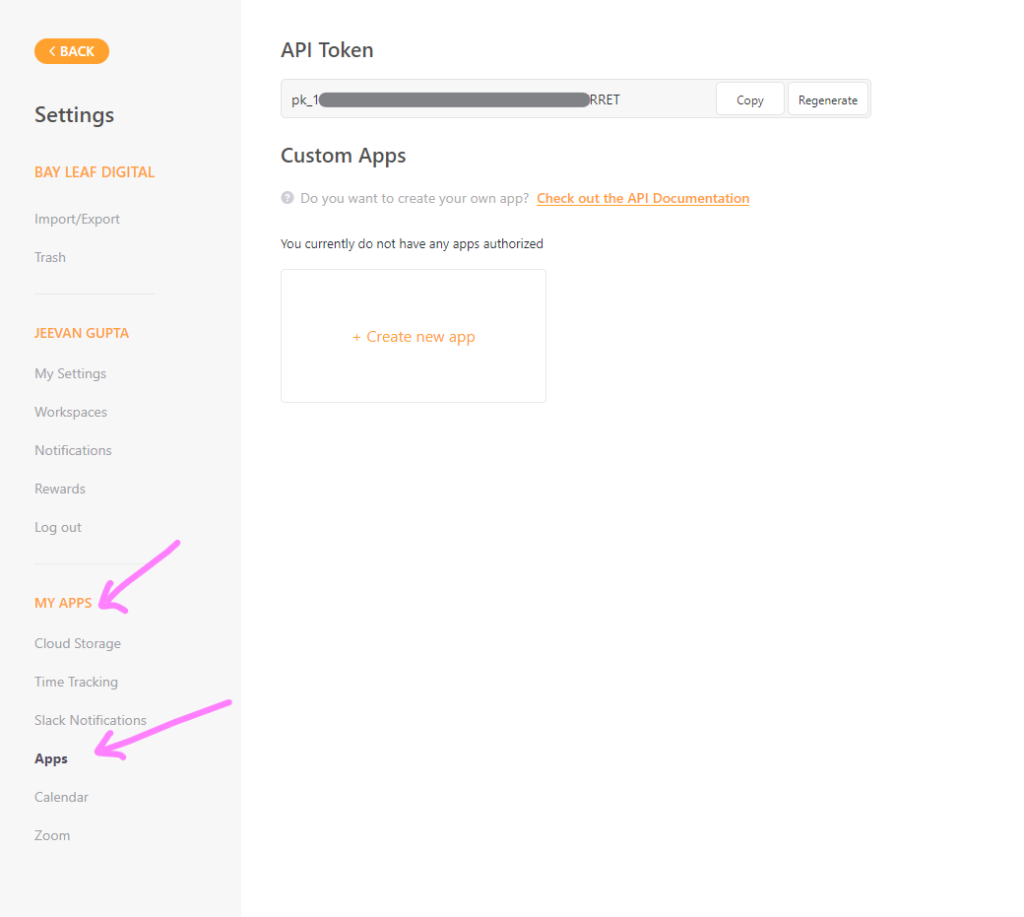
Finally, under MY APPS, click on Apps. Now you should see API Token. If not, then click on the Generate button. Refer to the below image to confirm we both are on the same page.
Keep the API Token safe. I will suggest you create a JSON file to store the token and upcoming ClickUp credentials.
2. ClickUp OAuth2 Authentication
2.1: How to create an Application in ClickUp
As we mentioned above OAuth2 Authentication must be used when you are developing an application using ClickUp 2.0 API. In this case, each user will have their own tokens i.e access_token. This way your application can access your user’s ClickUp details individually and process them.
NOTE: To complete the OAuth setup you need to have admin access to ClickUp.
- Login to ClickUp. You should see the below screen after you are logged in
- Click on your name initials (the workspace avatar) shown at the bottom left corner
- Select Integrations
- Click ClickUp API
- Enter the App name and redirect the URL
- Click on Create App
After the last step, you should see Client ID and Client Secret on your screen. Store it safely, preferably in a JSON file.
Lastly use the above App credentials i.e Client ID and Client Secret to generate an access token.
If you want I can help you out with a python code to generate an access token and the entire process automated. Get in touch with me. This all can be done in 1 hour for you.
3. ClickUp workspace data access using ClickUp 2.0 API Token
Below is the code that uses ClickUp API Token and ClickUp workspace ID to extract all the specific user-accessible spaces.
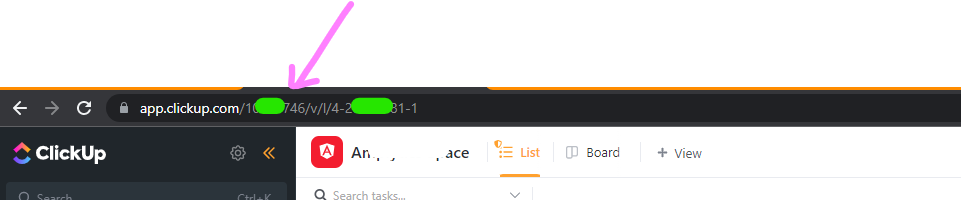
To get ClickUp workspace ID ( previously known as Team ID). Look at the ClickUp URL. Refer to the below image to see where the ClickUp ID is 10XXXXXX46.

3.1: Create a JSON file to store ClickUp credentials
Before accessing the details of spaces from the ClickUp 2.0 workspace we need to authenticate ourselves. To do this easily we will be creating a JSON file, where we will store API Token and workspace ID (Team ID).
Creating a JSON file to store credentials makes it easy to maintain, update and track credentials as needed. This practice also provides security to your credentials from other team members or one can easily exclude this file from keeping it in a public repository.
Proceed by saving the below JSON as “clickup_credentials.json”.
{
    "Api_token":"Replace with your API Token",
    "team_id":"Replace with your Workspace ID"
}
3.2: Python code to extract all the space from the ClickUp workspace
Save the below file as get_clickup_spaces.py and use the command “python3 ./get_clickup_spaces.py” to run the file.
The logic uses the space endpoint of ClickUp 2.0 API to access the workspace’s spaces.
#!/usr/local/bin/python3
#command: python3 ./get_clickup_workspaces.py
import sys
from datetime import datetime
import json
import requests
import time

def get_spaces(api_token,team_id):
    try:
        url = "https://api.clickup.com/api/v2/team/%s/space?archived=false"%team_id

        headers = {"Authorization": api_token}
        r = requests.get(url = url, headers = headers)
        response_dict = json.loads(r.text)
        #print(response_dict)

        spaces = response_dict["spaces"]

        if spaces:
            for space in spaces:
                print(space)
                space_id = space['id']
                space_name = space['name']
                features = space['features']
                print("\nspace name : %s | Space id : %s "% (space_name, space_id))

    except:
        print("\n*** Function (get_task_member) Failed *** ",sys.exc_info())


if __name__ == '__main__':
    try:
        timestamp = datetime.strftime(datetime.now(),'%Y-%m-%d : %H:%M')
        print("\n ClickUp data extraction process starts at %s "%timestamp)
        startTime = time.time()

        #reading json file
        cred_file = open("./clickup_credentials.json", 'r')
        cred_json = json.load(cred_file)

        api_token = cred_json["api_token"]

        #team_id is nothing but workspace ID which you will find in URL after login in to ClickCup
        team_id = cred_json["team_id"]

        #use this api to get clickup spaces
        get_spaces(api_token,team_id)

        print("\n ClickUp Analytics Process Finished.")
    except:
        print("\n*** ClickUp Analytics Process Failed *** ", sys.exc_info())
Congratulation! you have successfully set up ClickUp API. Hope I have made the entire process of generating ClickUp API Tokens and using them to extract the ClickUp workspace’s spaces.
Here is a guide to help in developing Python code for extracting space, folders, lists, tasks, and other ClickUp 2.0 details.
Hope I was able to solve the problem. If you like this article and think it was easy to understand do share it with your friends and connection. Thank you! see you soon.
For any suggestions or doubts ~ Get In Touch
Checkout out my other API Integration and Coding Solution Guide