Step by Step guide to install WordPress Plugins.
Hi readers, Hope you are doing good.
This article is especially for non-technical WordPress website owners or handlers, who get overwhelmed when it comes to searching for plugins, installing plugins, and finally activating and using them.
Here you will learn how to search, install and activate any plugin. Don’t stress out, we will do it in an easy-to-understand, step-by-step process.
Before we start it’s better to brush up the definition of plugin.
Plugin: This is a software add-on which when installed adds specific features to an existing program, enhancing its capabilities.

Worth Stopping here:
- How to build a WordPress website?
- How to set up free SSL for a Website?
- Plugins a WordPress website should consider installing.
Let’s dive in.
1. Log in to your WordPress dashboard:
Start by going to the admin panel. Now you will ask how to access the admin panel ( WP dashboard) of a Website? So for that add wp-admin at the end of your website URL and click enter. For example – http://your-domain.com/wp-admin/. You should see a login screen something like the screenshot below.
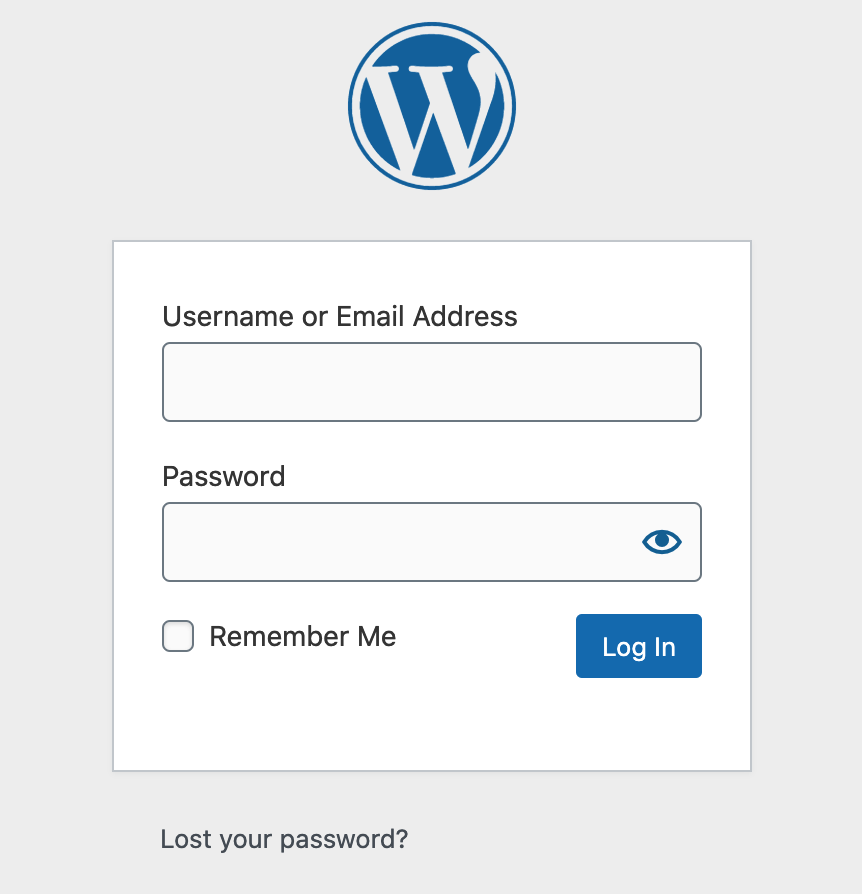
After login in you should see your website WordPress dashboard something like the image in step2.
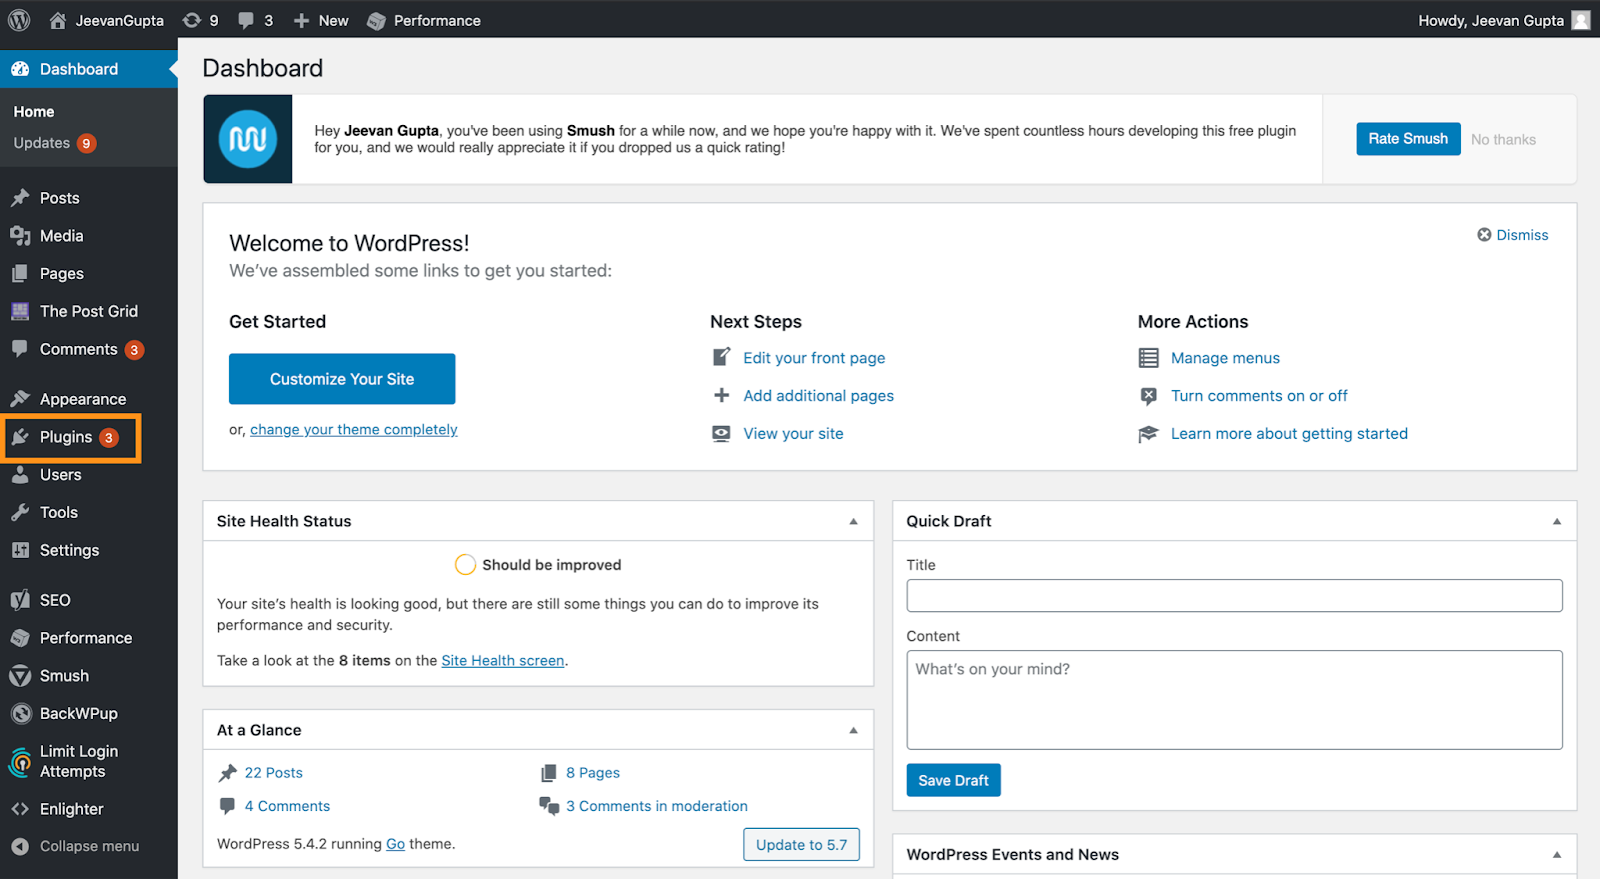
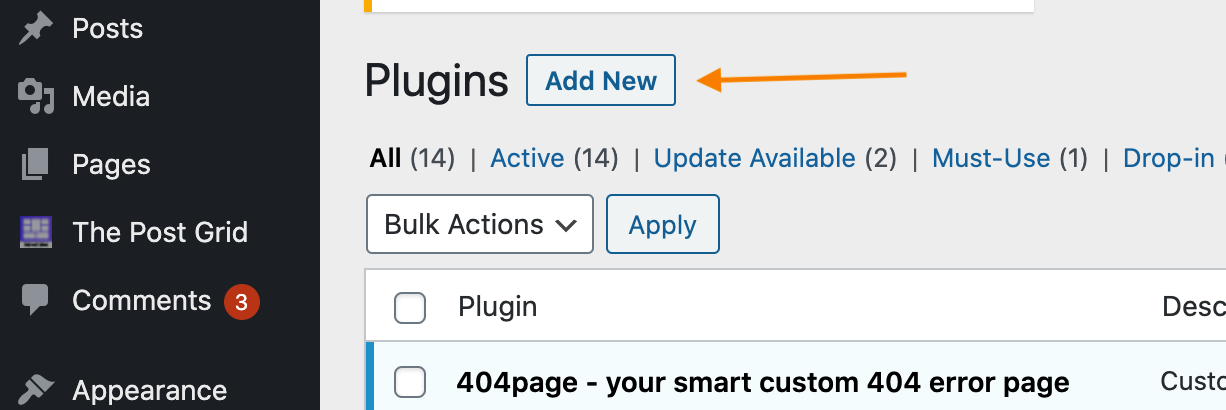
2. Navigating to Plugin Section:
Since you’re on your WordPress dashboard which will be like the below image. You should also see the “plugin” option on the left-hand side (highlight under an orange box in the image). Click on the plugin as soon as you find it.
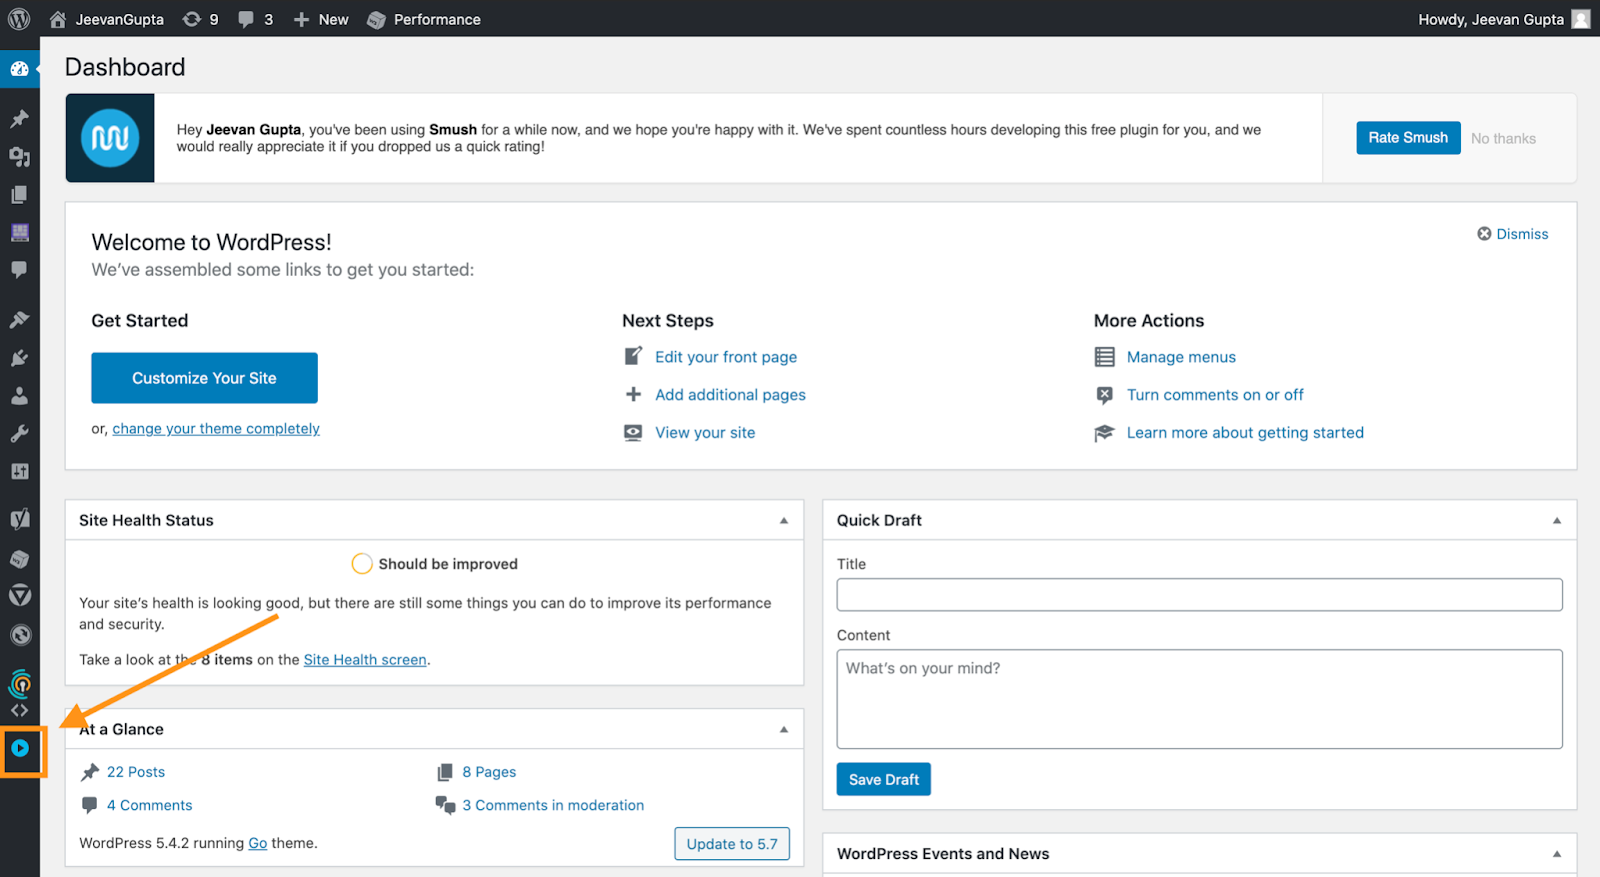
Heads Up if you don’t see any options on the left-hand side or don’t see the options like the above image and your screen looks something like the below screengrab. Then don’t worry click on “Collapse Menu” highlighted in orange in the below image.
3. Search, Install and Activate a Plugin:
Now you should be in plugin section:

Click on the “Add New” button at the top of the page.
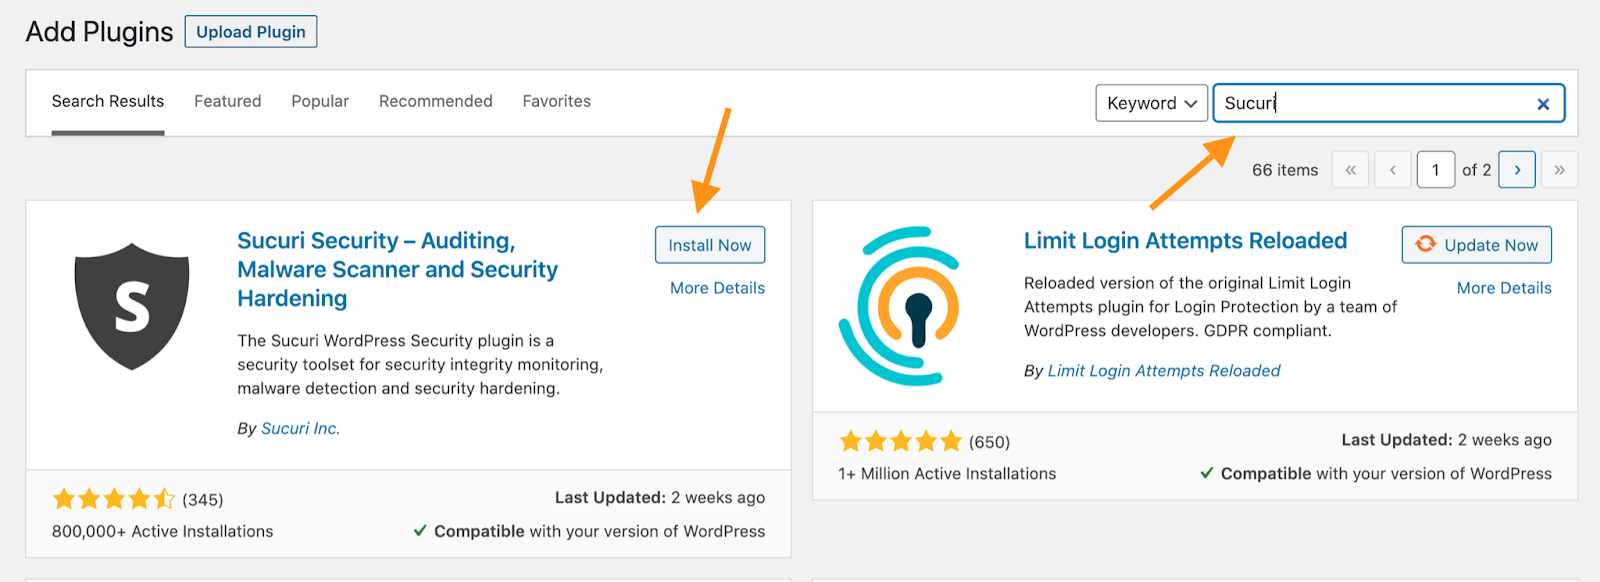
You should see a page showing you a shortlist of featured/recommended plugins. But ignore that and look at the search field on the right – this is the one we’re going to use.
Now type in the name of the plugin you need and want to install in that search field. In this guide I’m going to install a website security plugin, I picked it from the must-have plugins list.
So Look out for your plugin through search:

Next we will be Installing the plugin:
After searching by the name of your plugin you should see the plugin on the list. Next you need to click on the “Install Now” button. When you do that, WordPress is going to fetch the plugin and have it installed on your site.
Hurray, you are at the final step! After the installation is complete, click on the “Activate” to activate the installed plugin.
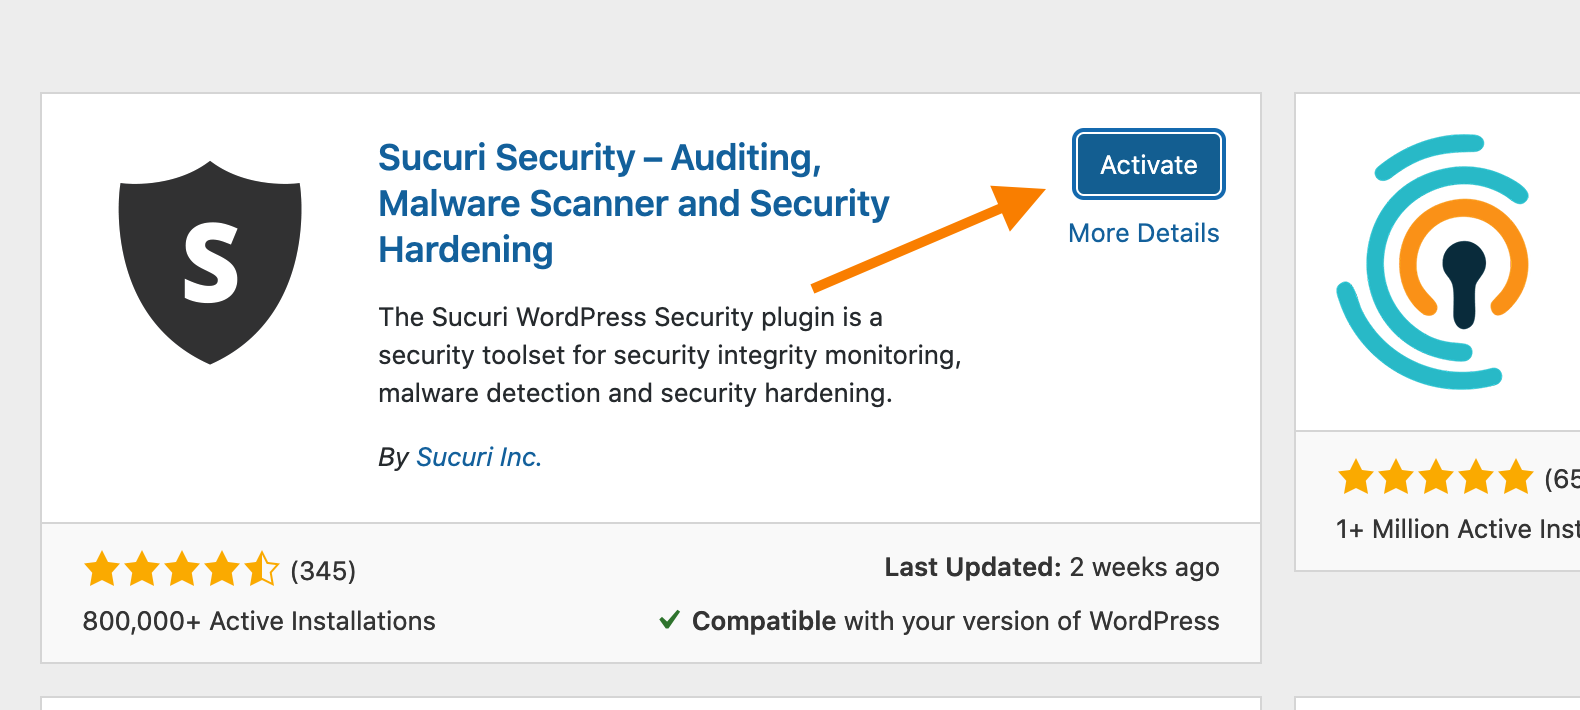
Mission accomplished! The plugin has been activated, and you will see it somewhere on the left-hand side of the WordPress dashboard.
Thank you for holding up till now. That is the end of How to install a WordPress Plugin session. Hope I made it simple to understand and follow.
If you have any questions, feel free to reach out to me through comments or other channels at your convenience.
For any suggestions or doubts ~ Get In Touch